Hungerford Arcade has a thriving record department of which I am the stallholder. With the sales of new vinyl records on the rise, whilst those of CDs decline, the question of how best to enjoy your music is worth delving into.
With many new records coming with a download voucher, many I suspect never even play these lovely fresh slabs of vinyl. For me these records should be played and enjoyed as intended.
You can of course buy new turntables from companies such as Pro-Ject Audio and Rega, but what if you fancy something a bit more retro looking? Turntables from the 70s & 80s can be picked up cheaply from online auction sites, but without proper set-up these could easily damage your precious record collection. Or perhaps that dusty old deck, that was consigned to the loft years ago, could gain a fresh new lease of life, but again, these will need a bit of tinkering with to avoid damaging your beloved vinyl.
So here I’m going to show you what needs doing whether you’re dipping your toe into the second hand market or restoring an existing record deck.
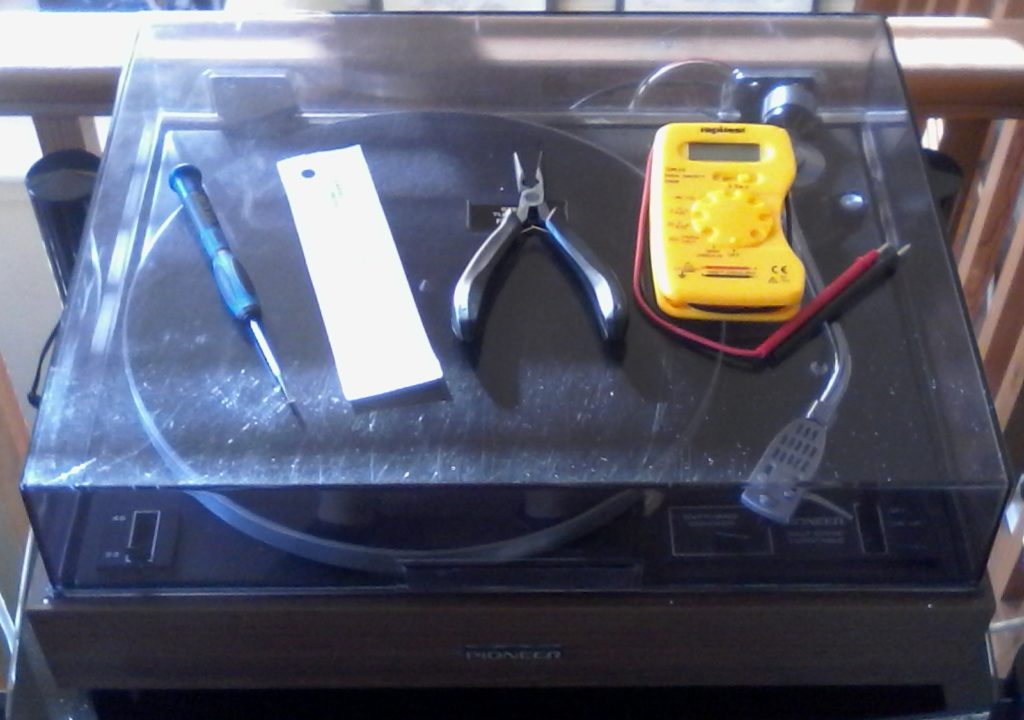
You’ll need the following before starting.
Multi-meter
Cartridge Alignment tool
Tracking Force Gauge
New Cartridge & Stylus
Needle nose pliers
Small flat head screwdriver
The first thing to check is the wires inside the tonearm, these wires need to be very fine in order to not affect the arm’s movement, as these are easily broken. If they are broken this is a very fiddly repair (or expensive should you require someone else to do it) and should only be attempted by someone who knows what they are doing.
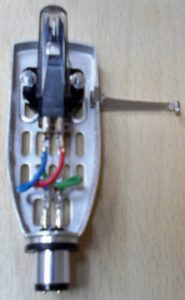
Set the multi-meter to its continuity setting and test each wire in turn. The wires and cartridge pin colours relate to the outputs as below.
White left channel positive [L+]
Red right channel pos. [R+]
Green right channel return [R-]
Blue left channel return [L-]
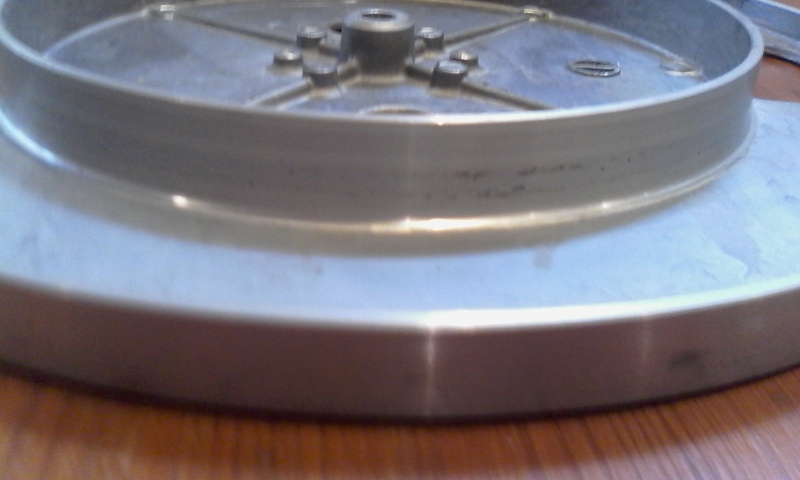
Once we know that the tonearm is fine we next need to check the condition of the drive belt. Remove this from the motor pulley and platter and check that it isn’t worn. Should you need a replacement belt these are readily available for most decks of this age online. If the rubber belt has perished clean (use a good quality foam cleaner) the surface of the platter or sub-platter to remove any residue before fitting your replacement.
Next we need to install a new stylus and cartridge. With a deck of this age I would do this as standard even if it already has one attached that looks OK. A worn stylus will damage you beloved vinyl so it’s worth not taking any chances.
For this deck I decided to fit an Ortofon OM5e cartridge and stylus, these are relatively cheap and easy to install. Because the Pioneer has detachable headshell all you need to do is fit each wire to the colour coded pin on the back of the cartridge with a pair small needle nose pliers.
 Once we re-attach the headshell, with the newly fitted cartridge, we then need to set the down-force pressure.
The down-force pressure is critical for if it is too low the stylus will fail to hold on to the groove wall and mis-tracking will occur, damaging both stylus and record. If it is too high the stylus will wear out the groove wall.
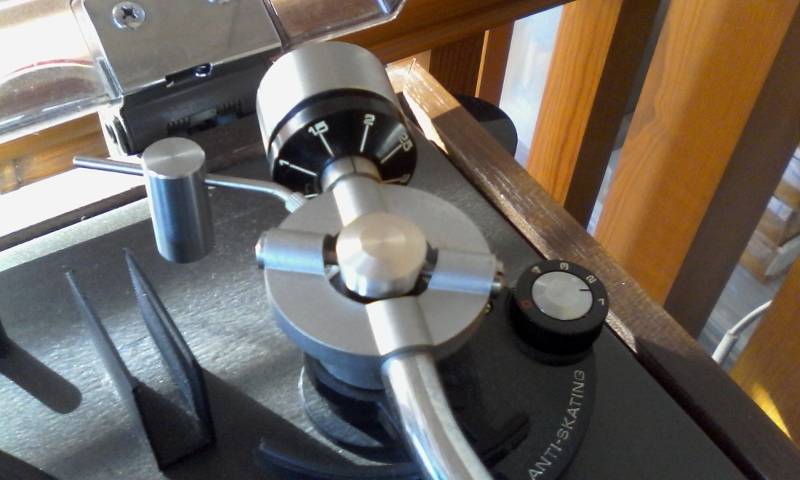
The down-force pressure is set by first balancing the tone-arm with the stylus cover removed from the cartridge. With a gentle pushing action, turn the counterweight along the rear end of the tone-arm tube.
Now move the arm so that the cartridge is positioned to the side of the platter then lower the arm-lift and carefully rotate the counterweight until the arm tube is in a balanced position.
 When the arm is perfectly balanced return it to the rest position. Now hold the counterweight, but do not move it, and gently turn the scale ring until the zero is at the top (i.e. 12 o’clock).
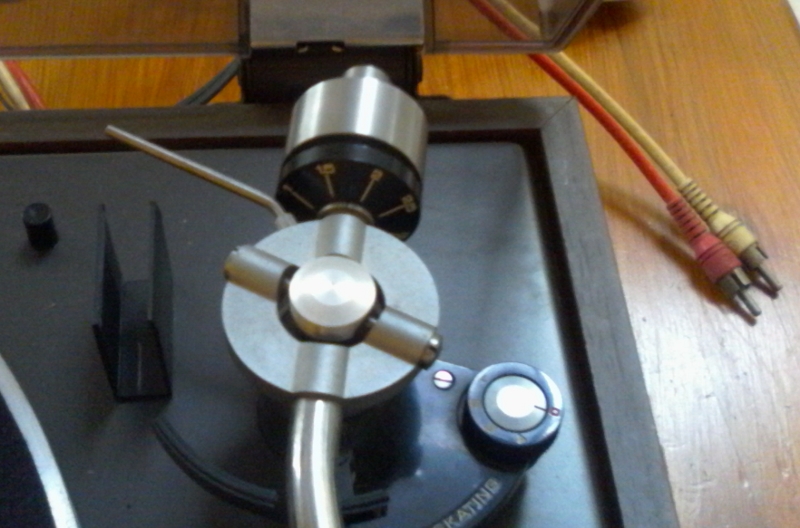
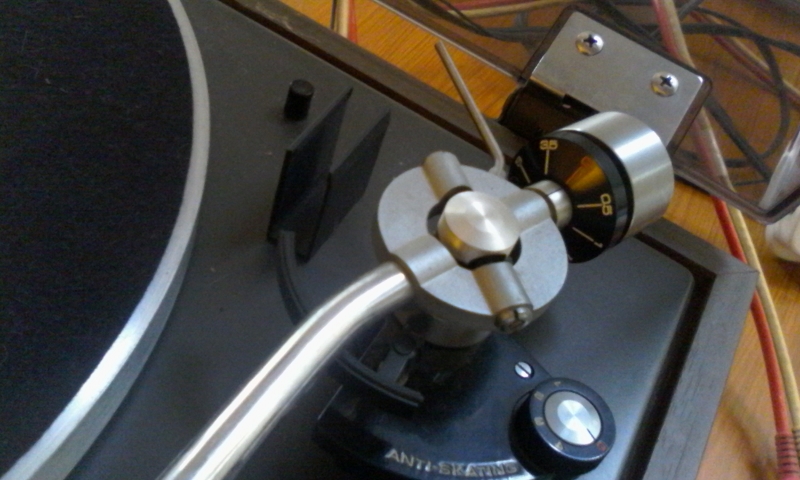
Check once again that the arm is balanced and then rotate the whole of the counterweight counter clockwise (seen from the front) to adjust the down-force figure to match the cartridge manufacturer’s recommendations (in the case of the Ortofon OM5e it’s 17.5mN).
Once the down-force is set it is necessary to apply a small force to the side of the arm to stop it swinging to the centre of the record. This is called anti-skate force or sometimes bias adjustment. With the Pioneer this force is applied by a small dial to the right hand side of the tonearm. It’s important to note that this force should match that of the cartridge downforce. In this case because we’ve set the counterweight to 17.5mn we need to move the bias dial to 17.5.
 Once we have the downforce and anti-skate set we can then move onto the cartridge alignment. This adjustment is vital to allow the tip of the stylus to travel along the centre of the grooves on a record. Without setting the correct alignment you will cause irreversible damage to the vinyl.
Take the cartridge alignment tool and place the hole over the spindle as if it were a record.
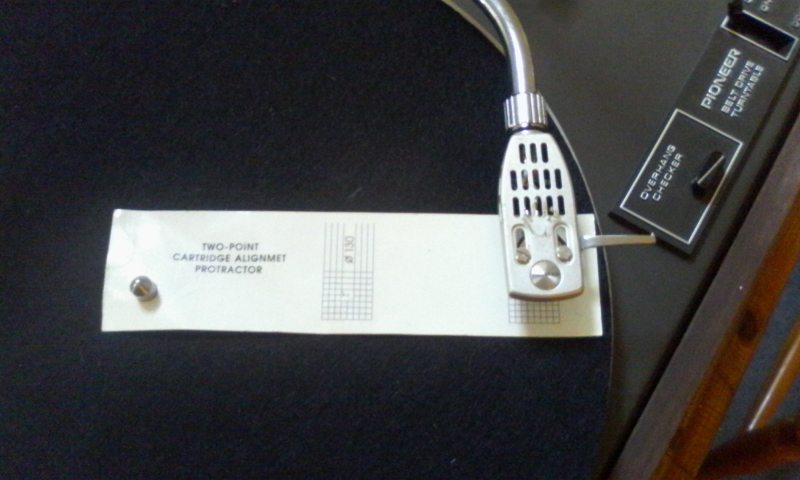
There are two calibration points, one near the centre of the disc and one near to the outside edge. Loosen the screws that hold the cartridge and gently twist the cartridge around its mounting so that the side of the cartridge body are parallel to the lines drawn on the protractor. Now move the cartridge to the second alignment point on the protractor and repeat the process. Once this has been done you should carefully tighten the mounting screws.
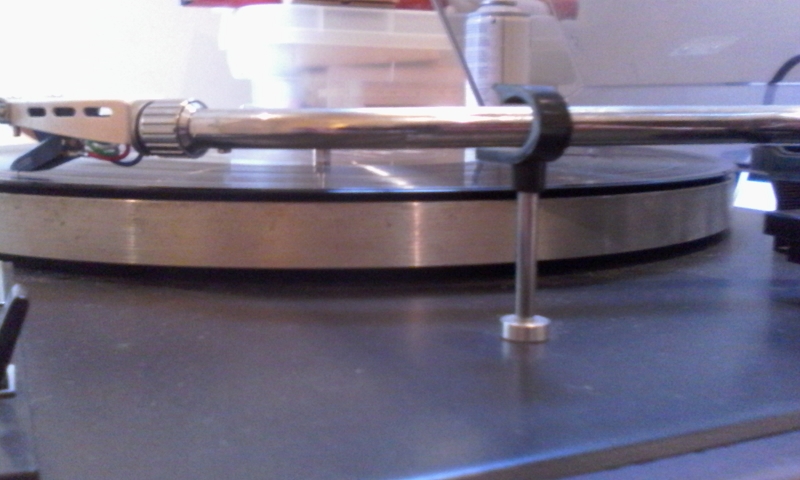
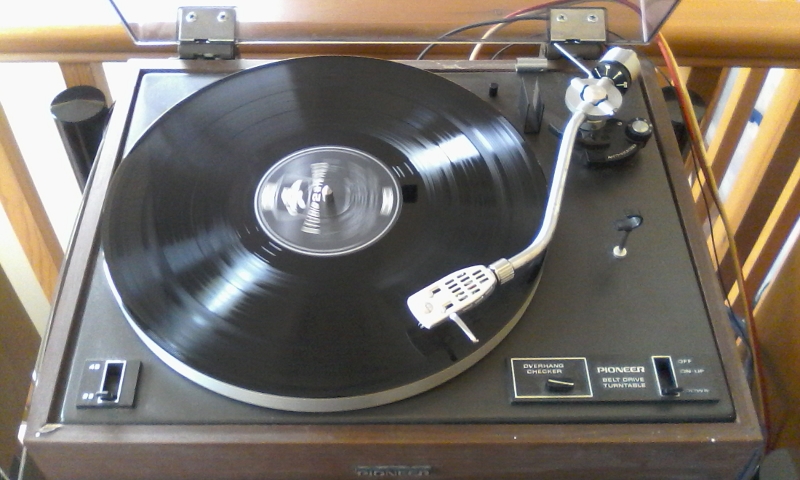
At this point I would next check the VTA or vertical tracking angle (this simply means that the tonearm should run parallel to records when playing) but as this Pioneer doesn’t have that adjustment I can’t. This does limit the choice of cartridge options as you’ll need one the same height as that which you’ve replaced. As it happens the Ortofon OM5e is the perfect match and as you can see from the picture below it works perfectly.
Now we have made all the necessary adjustments the only thing left to do is put on a record and enjoy the music.
Please feel free to contact me for further advice on adammsd@hotmail.com
Adam Thompson
Centurion Records – Unit 50 Hungerford Arcade
